|
|
|
|
|
|
|
|
|
|
|
|
|
![]()
case studies > case 01
Bathroom Case Study

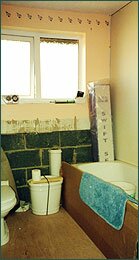
The first of our case history studies is a very common situation, the bathroom refurbishment. This bathroom was only partially tiled, with carpet on the floor and an ageing bathroom suite. The customer wanted to fully tile the bathroom, both wall and floor, install a new bathroom suite and make the room more spacious where possible by removing any unnecessary boxed areas.
 The first stage in this refurbishment was to remove the old tiles, strip out the bathroom suite and remove all boxing. Then the pipe work was examined, and where possible, moved to make more space in the room, so that less boxing would be required. As the floor was also being tiled, the existing floor was removed, new pipes were laid, and a new plywood floor was installed. The walls were also made good with new Aquapanel tile backing board where required (please see the Products section for further details on Aquapanel), and boxing was built around the remaining pipe work. The bathroom was now ready for tiling.
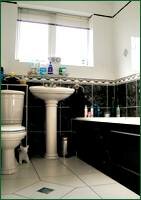
Firstly the walls were tiled, using white and dark green tiles from the Ermitage range. The dark green was tiled up to just above the sink height, then a border, then the white tiles, another border near the top and another row of white tiles to finish. A number of green marble tiles were used as an inset. These marble tiles were then sealed. The wall tiles were then grouted and once the grout had dried, the marble was sealed for a second time. The floor was then tiled, and the tile used here is the white tile, also from the Ermitage range. Another piece of marble was used, cut into a white tile, set in on the diagonal, as a centrepiece of the floor. The marble was again sealed, the floor grouted, and the marble sealed again. The new bathroom suite was then installed and all the plumbing work re-connected. (Please Enquire for further details on the tiles used.)
 |
The finished bathroom has a fresh, clean feel and is more spacious due to the removal of some of the boxing. The contrasting white suite up against the dark green tiles gives a fresh, modern look. (For further details on our fixing service, please see the Fixing Service section.) |